Sunday 20 September 2015

Kirsten T #3

In case your're wondering, I haven't got the numbers wrong, this is #3. I like this one so much I got photos of this one before #2. 

In very quick succession, after my second Kirsten T, I made #3. This time, I decided to change things up a bit. One of my favourite RTW tops (and the last one I've bought) has a front made of poly chiffon and the back is a fine poly knit (from Jacqui E - a mid-range Australian clothes range for women - lots of corporate wear). I really like the drape of the front and the knit makes it so comfortable. So I thought I'd give something similar a go. The September MAGAM theme 'snoop sewing' was all the incentive I needed.

I decided to go with similar fabrics to the RTW - a polyester chiffon for the front and a lightweight poly knit for the back. To assist in fit and improve the hang of the top, I cut the chiffon on the bias. I was a bit worried about the this. Cutting chiffon out is always a challenge - slippery and fine. Add cutting on the bias and I was sure the whole thing would skew. So I cut it out on the floor (no weight dragging anywhere) and used a mix of weights and pins. One arm was a little off but on the whole the front and back matched up well.

I used the same neck finish as previous Kirten T makes, using a strip of the knit fabric. I treated the chiffon front and knit back slightly differently. I stretched the neck over the chiffon only very slightly - enough to keep the neckline sitting flat. I stretched it out more over the knit. I varied up the topstitching too - plain straight stitch on the chiffon and a triple stitch over the knit. The front is sitting beautifully. A little bit of puckering on the back. I think this could have been remedied with some stabilising. Next time!

I wasn't sure how to best finish the hems. Should I use different finishes for the chiffon and the knit? I  decided to focus on the best finish for the chiffon. I chose a narrow double-folded hem. Rather than try to wrangle a double folded narrow hem with the knit (impossible!) I chose to fold that over just once. And then a triple straight stitch to finish the whole lot. It worked.

I'm really happy with the way it turned out. Please forgive the crappy photos. Black is so hard to photograph.

Tuesday 15 September 2015

Spring - summer planning

Spring is certainly in the air here. I'm beginning to think about warmer weather clothes and seeing some gaping holes in my wardrobe. I worked my way through Colletes wardrobe architect series earlier this year in preparation for my winter wardrobe. I stayed pretty on task, although as usual I didn't get all my makes done. And I'm ok with that. So I reviewed my colours and I don't want to change them. Nor my silhouettes. The one thing that I do want to do though is include some thinking around the difficulty of makes. My head just can't cope with difficult makes all the time.

After focusing on dresses in the last while, I'm going to work on separates. So here we go.
  1. Skinny 7/8 pants (Burda 7062 from black bengaline suiting)
  2. Casual skirt (Molly Makes Sewing jeans skirt from aqua cotton sateen)
  3. Fitted sleeveless top (McCalls 8405 from black/white cotton sateen)
  4. Jacket (Burda 8810 from bright cotton sateen)
  5. Fitted collared shirt (Butterick 6026 from mid weight blue cotton print)
  6. Maxi skirt (Sewaholic Gabriola from not sure yet 😉)


I'm not sure if I'll get it all done but I'm ok with that. 

Friday 11 September 2015

Molly Makes Sewing make #1

KI saw the Molly Makes Sewing magazine when it first came out earlier this year. By the time I realised I really, really wanted a copy, it had disappeared from the shelves. And then of course I started to see all the makes published in the blogosphere. And I felt that I was really missing out 😔.  Lucky for me (and you) Molly Makes sells back issues from their website. Interestingly the cost including postage is only marginally more expensive than buying it from a newsagent. I still prefer to buy from my local newsagent though. Nothing beats personal service. I've never seen a magazine before where I would make every project included. Every. Single. One. So what to do first? The jeans-style skirt? Skater dress? Quilt print dress? Biker jacket? Cute mini knickers? Oh boy!

I've made a sewing plan for spring/summer - based again on the awesome Wardrobe Architect series by Collette Patterns. And summer PJs are on the list. So PJ shorts it was! The great thing about Lauren's (from Guthrie and Ghani) pattern is that it's a fabric miser too so it was easy to do some stash busting. The main fabric is a cute poly cotton print left over from lining my By Hand London Blazer. And I used some plain aqua poplin for the contrast.


This was the first "combination" waistband I've done - an elastic back connected to ties that go around to the front. A great idea - very comfortable to wear. I like the waistband finish at the front too. Interfacing strengthens the button holes for the ties. Buttonholes could be better 😉. 


More sewing machine discovery too. I was sure that my pfaff didn't have an off-centre straight stitch. But I was wrong. I found it by accident, having a play with my stitch selector and scrap fabric. Made top stitching the cuffs a breeze.


Kirsten Tshirt

When I went for my first visit to Catwalk Fabrics and bought the fabric for My Oslo, I also fell victim to the attraction of a khaki linen knit. I've not worked with too many knits and never with linen but once I had picked this up, I wasn't going to put it down 😊. It sat in my stash for only a little while before I figured out what I wanted to do with it. It's almost exactly the same shade as a tshirt I have which is nearing the end of its life. I contemplated copying a pattern from it but also rifled through my patterns. I remembered that I had downloaded Maria Denmark's Kirsten tshirtSo now I had a plan just no time to make it.

And then last weekend, a window of opportunity opened. A quiet afternoon with uninterrupted access to my sewing machine. Yippee!  I chose the large size and glued the paper together to make the pattern and then decided to overlay my old tshirt over the pattern to check the sizing. I was surprised to see they are almost identical. I'm glad I didn't copy the pattern myself! I decided on using fabric as the neckline ribbing.

Whilst I was waiting for the pattern pieces to dry, I thought I might read the pattern (novel, I know). I'm really glad I did because I learned that Maria uses different seam allowances depending their function (no allowance for the neckline, 1cm for seams and 2cm for hems). No seam allowance at all! Not something I'd done before but I went with the flow. I cut it out using my shears and pattern weights. I was worried about damaging the fabric with pins. It took about 15 minutes - three pattern pieces only.


I tried something else new too. A new stitch. I'm still getting to know my "new" sewing machine. And I've barely used the stretch stitches. I stitched all the seams with a triple straight stitch. I'm impressed. It works. I also used a twin needle to finish the sleeve and bottom hems. I was worried about this stitch, especially since the linen is so fine (skipped stitches? No!). I love the dual feed - go Pfaff!


This also fits the August MAGAM theme of basics and it's not the only one I made. Stay tuned...

Wednesday 19 August 2015

Pattern weights

Hi there. Been busy doing lots of different things (work, family, friends and sewing) so no time for blogging. I've finished my #4 dress from the 2015 OAL (don't worry a blog post is brewing). I made the lining from bemburg rayon and it became very clear to me that pinning and cutting straight off the pattern was not an option. As time was of the essence (it was the OAL after all) I used pantry items as pattern weights. But it got me thinking. There are so many DIY options (check out this great post summarising 11 different ways from sew-so-easy).


I was at my local hardware shop a little while ago and found a pack of washers of about 1" diameter. My plan was to group 4 or 5 of them together wrap them in fabric scraps but I had yet to get around to getting any fabric organised. And then I saw the stacked pennies crocheted together. Why not do the same with the washers? I had a bit of 8ply cotton yarn lying around. I used the same approach as the Zen of Making's pocket change to pattern weights - magic circle to start, crochet two increases so the crochet matches the washer diameter, two rounds with no increases to make the sides and then decrease over the top. That bit was a little challenging. Holding the washers together whilst decreasing required some concentration. But the end result is pretty good. I'm looking forward to trying them out.


Do you use pattern weights? Are they DIY?

Sunday 24 May 2015

OAL2015

Are you in this year? Andi from Untangling Knots and Lauren from Lladybird have announced another Oufit Along. I'm definitely in! I participated last year (although I took forever to get my photos posted). It's a great way to get yourself organised and sew and knit along with people from all over the world, and try out a new knitting or sewing pattern. I love checking out what everyone else is making. Check out the Ravelry group set up (www.ravelry.com/discuss/untangling-knots/3202861/). Everyone has made such great combinations of fabrics, yarns and patterns. The great thing about this OAL is that, although there is a recommended dress pattern and a knitting pattern recently released by Andi, you can make up any combination that you like. Andi has created a new pattern Vianne, which I think is lovely and I can't wait to try. Lauren has challenged us with McCalls 6887, which I like but I don't love and I don't think I have the headspace right now for a completely new frock. So I'm going back for another go (my fourth!) with Simplicity 2648. I'm going to raise the neckline a little, use the sleeve cap and this time, I'm going to line it (it's an unlined pattern). So same, same, but different.

So here's my combo. Simplicity 2648 from some stashed Lisette cotton sateen and Vianne with some fantastic cobalt blue colonial wool from Bendigo Woollen Mills. The cobalt blue yarn and the blue of the lines in the fabric pattern are a good match. Colonial is the yarn that I first tried from Bendies. Lot's of fantastic memories here, including the first jumper I knitted for my now husband.


This will also be my June MAGAM. Hopefully it fits the theme 😊

Wednesday 20 May 2015

MIA

Geez! I've just realised that it's been over a month since I last posted. It seems like only yesterday but also a lifetime ago. This last month has been the perfect storm where work, family, extended family and health have all collided. I've managed to muddle my way through the craziness but the one casualty has been my "me time" and especially sewing. Before this I had embarked on a more technical detailed project (Simplicity 1421) which I had committed to for April MAGAM. So far I've sewn three seams. That's it. And honestly, I'm not keen to take on this project when the rest of my life is so hectic.

In the meantime I do have some progress to share. I have had to travel a bit lately and had planned for quiet evenings which I mostly got. To tide me over, I started knitting a cowl. Not just any cowl. Seamstress Erin's roses and leaves double knitting cowl. I thought twice about starting this. Would it be too much? I'm not the best concentrator when I'm travelling for work. And I wanted a relaxing project. I decided that it would fit the bill and I'm really happy to say that it has. This pattern is a fab balance between repetitive knitting that is good stress relief and an interesting pattern repeat to stop boredom setting in. The pattern is repeated three times in each round. Just right. Enough to get comfortable but not too much that I lost interest. So I'm now just over one third of the way through. And I'm pretty darned happy with it. Ravelry notes are here.


Saturday 11 April 2015

A quick black top

I've realised that I don't want to make every make a hard, complex make and there have been a few of these lately. During one of my recent pattern purchases I selected some Kwik Sew patterns. I've not used these patterns before. It was underwear patterns that caught my interest at first, but I also picked up Kwik Sew 3658, a dress/top pattern. Pattern notes: "Fitted pull-over dress and top with v-neckline and draped collar". It was the draped collar that caught my eye. And I thought it would be a good work staple.


I also picked up enough mid-weight black poly ITY to make it up. The pattern and fabric languished in my stash for a little while. But after my Oslo I was keen to follow up with another easy make. I've not had much experience with ITY. I was unsure what stitch would be best so I went to my sewing manual. My machine has 30-something stitches, half of which are stretch stitches. With my previous knits experiences, I have used the stretch straight stitch as well as a narrow zigzag, both with great success. But I thought I would try something different. In addition, the pattern has narrow seam allowances, so I tried an elastic overlock stitch to protect the seam from any fraying.

This pattern has four pieces: a front, back and two sleeves. I had it cut out and ready to sew in less than an hour. I had trouble visualising the collar; the front is self faced and the seam between the front and back is off the shoulder towards the back. But I faithfully followed the instructions and it all worked out.


But I am disappointed with how the seams turned out. Rather than a clean straight seam, the overlock seam has created a ripple effect on the seams. The most obvious is the centre front seam. You can see it pulling in the photo - although it doesn't look as bad when worn. I was discussing this issue with a sewist colleague. I mentioned "error". She scoffed and said "purposeful design." After I stopped laughing 😉 I realised that she's right. Just because the seam isn't smooth and how I wanted it to look at first, doesn't mean it's not "right." And the ripple seams does change a pretty bland top into something a little bit different. Fir is pretty good. ITY is pretty forgiving. I will make it up again and will add about 1" to the length. 

My Oslo

I have subscribed to Seamwork by Colette Patterns. Sarai's philosophy of interspersing complex makes with simple ones resonated with me. My pattern stash and planning has focussed on more technical, detailed clothes. So Seamwork came along at the right time. Recent makes include two fitted dresses and a semi-fitted and collared shirt so it's time for a simple make.

It's also starting getting cold! March's MAGAM marked the transition to Autumn (and Spring in the other half of the world). So I've decided to make an Oslo. Have you seen this pattern? It says "snuggle" and "comfortable" and "warm".

I've already introduced my new favourite LFS (hello Catwalk Fabrics!) and during my last visit I found some wool polyester knit in a pale cream/pink colour. It was the colour that caught my eye and its feel that got it off the rack and over to the cutting table 😊. This fabric is a one-way about 20% stretch.

Before I cut into my fabric, I researched how I should handle it. Here's what I did:
  • I prefer shears to a rotary cutter but in order to minimise distortion I traced each piece onto the fabric before I cut out
  • I used pattern weights (aka cans from the pantry) instead of pins
  • I did consider cutting out on one layer of fabric, but this knit is fairly stable and the wool loosely locked together with very little movement, so I cut out the pattern with the fabric doubled
  • I used a jersey needle, with a fuzzy poly stretch thread in the bobbin (hand wound - a zen moment) and a triple knit stitch on my sewing machine
  • I always back stitched at the beginning and end of each seam - learned this one the hard way
I cut out a straight medium. The fit is very forgiving so I didn't make any adjustments.

Sarai's instructions are excellent. They were easy to follow with plenty of detail. I made up according to the instructions with the exception of the cuff hems which I finished by hand with a slip stitch. I'm into hand finishing seams at the moment. I didn't add buttons. I like the more casual no buttons look. 

I'm really happy with the result. Arm length is perfect although some people might think they are a little long. The shawl collar sits nicely.

I've been waiting for weeks for a drop in temperature so I can wear my Oslo out. Last week I had my first opportunity to wear it and received some lovely compliments, but it's taken me another week to remember to take a photo.


Thursday 2 April 2015

Humming Bird Shirt

I've been inspired by some fave bloggers working through shirt construction (MPB and Sewaholic - excellent blogs!). I am short of nice shirts and wanted something that would look equally nice dressed up for work or down for casual. I have been looking for a shirt pattern with shape but not too fitted. Also a collar. I took ages to find one that fitted the bill and when I did, of course my choice was an OOP pattern - New Look 6407. But luckily I found it in Etsy. I like the variations available in the single pattern: collar - no collar, short sleeves - long sleeves, cuffs, lace. Love it!


I had a recent stash acquisition languishing in my pile. It's black poplin with bright coloured humming birds flirting across it. Not my normal fabric style but I like it. It wasn't expensive so I decided that it would be good for a wearable muslin.


I made up a standard 14, with short sleeves and a collar. The final fit isn't too bad. Good dart positions. A little large all over and a bit larger again over the hips (usual for me). The main issue is the plunging neckline. It sits waaaaaay lower than I comfortable with - especially at work 😉.

Here's a bad mobile shot from work.


Monday 2 March 2015

Little Black Dress

I've become a convert to making multiples of one pattern. There are plenty of bloggers out there showing how efficient this approach can be. You can tweak fittings and refine techniques. So I'm up to make #3 of Simplicity 2648, the Amaziing Fit dress. This time as a little black dress. I found some mechanical polyester at Spotties. A nice mid-weight fabric.

It's also "Frankenpatterning" month of the 2015 Make a Garment a Month. Given that this is make #3 of this pattern, I thought I would change things up a bit. So I've taken the shell of S2648 and the neckline of a free pattern available from craftsinstitute.com, the 1950s party dress by Jeanne Spaziani, to make a high boat neck dress with a v-back.


I had lots of fun drafting the bodice pieces. I had already copied the pattern pieces onto tissue paper. This meant that I could easily overlay the pieces to draft the correct lines. More of a challenge was figuring out what to do with facings. The basic pattern has both neck and armhole facings for the sleeveless version, but when the neckline was changed, this made too much bulk at the shoulders. So I had a go at combining the facings into one facing for the front and one for the back.

Honestly, this has not been an easy make. The fabric has been difficult to manipulate. Ironing seams needed lots of steam and a heavy duty pressing cloth. I top stitched the princess seams to get them sitting flat. Some how I managed to get the princess seams on the front bodice and skirt pieces slightly misaligned. So I have to wear a belt. Oh well, I think that's the way I'd wear it anyway. Getting the zipper to line up at the bodice seam was a real pain too. The fabric has some stretch - enough to be a hassle. Ripping seams on black fabric at night time is no fun at all. It took three goes to get it in right. Argh!

I had to get inventive making up the facing seams too. I read the party dress sewing instruction after I had drafted the pattern pieces and cut out the fabric. Luckily I read them before I started sewing. The seams allowances are 1cm (compared with 1.5cm in the Simplicity pattern) (note to self: READ ALL THE INSTRUCTIONS BEFORE YOU DRAFT PATTERNS AND CUT FABRIC). I just started with 1cm seams at the shoulders and graded out to 1.5cm at the back zipper.

I did have to think about how to sew up the all-in-one facing. And yes, I did get all the way through to trying to turn the facings before I realised that wasn't going to work (sigh - more unpicking!). I discovered two approaches - turn with open shoulder seams, or turn with open side seams. I chose the shoulder seams as I had done so much sewing but next time I do this neckline, I'll try the side seams approach as it was tough pulling through with such a narrow shoulder seam. 

But in the end, I finished (one day late for MAGAM whoops!). And, I'm really happy. I wore the dress to work today and had two compliments, including "it looks like something you'd get from Cue" which I took as a complement 😊

Bad mobile shot in a work mirror...

Off to plan my Mad March MAGAM.

Tuesday 3 February 2015

Amazing Fit #2

After my success with Simplicity 2648 with my wearable muslin, I decided to have another go pretty much straight away. And no, still not an LBD, but a pretty go-to-a-wedding dress (congratulations Alanah and Luke!). I had some dark blue with white, pink and tangerine flowers stretch sateen in my stash - sounds weird but I love it - that was earmarked for a frock one day.

No significant mods beyond what I had already done with the muslin. Pattern placement was important as the flowers were distributed in bands across the fabric. I wanted to maximise the pretty flowers! I just managed to squeeze it all in. I decided to give the short sleeves with folded back cuff. I think it turned out really well - good fit, good pattern placement and very suitable for a warm January afternoon beach wedding.


Sorry, no wedding shots (of me!) yet.

Saturday 31 January 2015

Amazing fit wearable muslin

 I have been wanting an LBD for a while now (in 2014 planning  but I've not yet got to one. The main reason is that I've not found a pattern that I'm happy with. So I've started looking for one. First try is... Simplicity 2648 an Amazing Fit dress with bodice and skirt cut separately and princess seams down the front (darts at the back). I was intrigued by the idea of Amazing Fit. Different bust sizes (a,b,c) as well as straight, average and curvy shape. Given my shape and previous Simplicity pattern experience, I decided to try a B cup and straight shape. The final measurements including ease reassured me that the fit would be close. I find the "as constructed" measurements invaluable.

I picked the cap sleeves. Or as the pattern calls them "flanges" (yuk!). And a round neck. This pattern called for all of the princess seams and darts being constructed and then the side seams being basted to allow for fit adjustment.

I also decided it was wearable muslin time. So I headed down to Spotties and found some stretch sateen that I liked. I was a little nervous as the regular 4-petal pattern black-on-white needed to be treated like a check (plaid). I spent lots of time carefully laying out the pattern pieces. Making sure of both directions on as many seams as possible. The princess seams posed a challenge. But then the mathematician in me kicked in. Using the regular pattern, I could offset pattern pieces and still try for pattern matching. And I did it. Well, nearly 😉 the princess seams went well.

I also lengthened the bodice by 1/2" (usual pattern mod for me). This is where I came undone (just a little). The horizontal lines were not quite right. I contemplated throwing my hands in the air and throwing the whole thing into the furthest corner but then I took a breath and finished making it up. On my final fit I grabbed the nearest belt I could find. It's amazing how much of a slightly out-of-kilter seam a belt can hide.

I wore it to work the next day (with a belt of course) and My Miette and received not one but three complements. Job done! Please excuse the photo. The dress had been in my wardrobe for a day and was a little crushed.
Wardrobe shot. Apologies for the wrinkles

Tuesday 6 January 2015

Blog catch up #2

There are a few more makes I need to update.

Knit Hoodie. After the success of the pants sewing, I decided to buy another Craftsy class. Sewing with Knits with Meg McElwee. I've sewed with knits before but I've never been confident that I'm doing the right thing so sitting down with a pro (in a virtual sense) is something that I've been wanting to do for a while. Whilst I really want to do the tshirt, I decided to start at the beginning (!) with the hoodie. I have some left over poly? knit that feels a bit like a lightweight ponte from when I made X a dinosaur constume when he was 4 (ok I'm now officially feeling old). It's been in my stash for so long now, using it for a test piece is fine. I'm sitting between a S and M in sizing so decided to cut an M.

I stitched along with Meg. Gee, she's lovely! Between her fab smile and great techniques, it was a pleasure having he in my living room :). I spent more time cutting out than I would usually but I think the result was worth it. I laid out the pattern pieces, weighed them down and marked them out with tailors chalk rather than trying to cut using the pattern (thanks for the tip Meg). No distortion. None. I am going to try this with other patterns that use heavier weight paper in the future. Knits and not-knits.

I was worried about attaching the hood with the crossed over front. I couldn't  visualise the instructions. This was the only bit that I struggled with. So I took a big breath, and stepped through (very slowly) Meg's instructions. And guess what? It worked! The finish is great. I must admit to being a bit nervous about using the twin needle to finish hems, but again, Meg's instructions were great and there were no problems. So that's another thing off my CTT list.


Knit Tshirt. Whilst I was still on a roll, I grabbed some lightweight cotton knit and trialled the tshirt from the Craftsy course "Working with Knits". This is the second of 5 pieces made in this course and builds on the first, the hoodie. The best thing I learned from making this top is how to make a flat self bound neck. And yes, it really is flat. I decided to make the 3/4 length round neck T. There are other sleeve  and neck options. This was made up really well and I'm very happy with the result.

London blazer. Yep. I'm on the bandwagon. And very happily on. I've made a London jacket designed by those fab gals at By Hand. Love! I wanted to try the cropped version first. This would fill a gap in my wardrobe. I wanted a plain fabric. Maybe with a cheeky surprise for a lining. I decided on white sateen - just a little bit of shine. And my lining is some poly/cotton poplin that has both strawberries AND polka dots on a pale aqua background. I really like this fabric.

The outfit came together well. I was a bit nervous about attaching the collar/lapel - I couldn't visualise the end result in my head. This is not common for me. But I slowed down and followed the excellent instructions and it all worked out. No problems at all.

Blog catch up #1

I've started to plan for 2015 but before I articulate my ideas I want to finish off 2014. I have a bunch of projects that I haven't blogged about and I want them on the record. Unfortunately not all are photographed, sorry. These are listed in no particular order.

Hello Sailor! The Princess was in a drama production in June. She was a sailor. We spent a wonderful time working through costume options. What fun! She decided on a pair of wide-legged pants and a stripy t-shirt, with a bandanna and sailors hat. Trousers (Simplicity 4206). A plain jane version would fit the bill here. So we found some cotton drill and I made them up. We also found a t-shirt pattern (New Look 6241) and made it up in a simple blue and white striped fabric. It's a little on the small size but it completes the costume. I used the techniques I learned (or confirmed!) during my Craftsy Knits course.

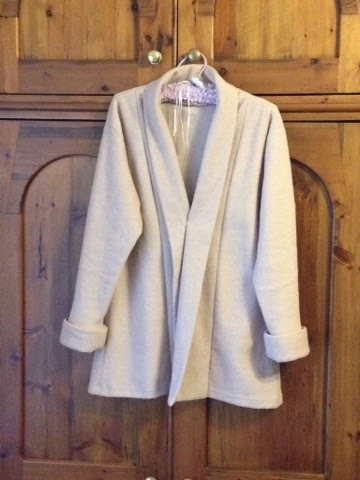
First knit. This pattern (Burda 7871) and a black cotton knit had been languishing in my stash for years (gasp!). I have spent my sewing career avoiding knits. Lots of reasons really. Didn't have the headspace, too many other things to do, it looks too hard. Now I've done it, I'm wondering what all the fuss was about. I think I was lucky though - good fabric, freshly serviced machine, good pattern. I chose the longer skirt of view A and the short sleeves of view B. It did take a bit longer than I had hoped. I had to rework a couple of seams and ripping black seams at night was hard. I used a twin needle for the hems. How good are these? I could never get such a tidy hem otherwise.

I interfaced the seam allowance along the neck, as suggested by the directions. It took a bit of time, but the effort was worth it. The extra bit of stability was helpful. There was a bit of puckering along that seam but I'm still happy with it. I struggled with setting the arms in as well. Easing knits for arms is not so easy.

Whilst the end result is a bit plain. It's a great basis for some more exciting pieces. I've just picked up a pair of cute cobalt blue earrings to match leggings. The three together will be great!

Colette Jarmies. More stashbusting! Patterned and plain polyester satin that has been earmarked for PJs since before X was born. Nothing like some re-found fabric to get the creative juices flowing. I can't believe I let this move to the back of the cupboard. I love it! Navy, antique gold and burgundy. Roses and paisley.

I started with the patterned satin to make a Sorbetto top. I bound the neck and arms with navy satin bias (not me-made). After my first Sorbetto experience, I decided to move the dart points up slightly. I just pivoted the point. Next was the bottoms. I was considering boxers. I like the idea of comfy boxers. But are they cute enough? Hmmmm... THEN I saw Colette's Madeleine bloomers. That's more like it! So plain navy poly satin with gold ribbons.The grand unveiling to the family got a resounding CUTE! And they are!

Trousers. This year, I made my first pair of pants since X was born. Nothing like having a baby to mess around with body measurements (and image... ASIDE have you read this great article by Karen (did you make that) which she blogged online at The Guardian? Seriously resonated with me). I knew I had to take the plunge and make my own pants again. I am long waisted/crotched with almost no hips so finding a well fitted pair of RTW pants is impossible. I have done a couple of Craftsy classes already and Sandra's class on fitting pants came along at just the right time. She showcases her Vogue 2948 pants pattern.


Sandra's pattern has princess seams. I like princess seams on most things and these pants are no exception. I sat though her class and re-watched plenty of it. I found Sandra's conversational eclectic style really enjoyable. It was like she was in my living room with me, chatting about fitting issues. I also learned that I have a slightly swayed back.

I spent ages drafting and redrafting pattern pieces. I had promised myself that I wouldn't work on anything else until I had got this pair of pants finished. Working full time is not conducive to completing the calculations, recalculations and reflections that this project required. Some nights nothing got done. I would rather take more time than stuff something up. Plus I quite liked the slower pace. So this project was measured in weeks.

I made the "mistake" of using stretch cotton sateen which is great to sew but not a recommended fabric for this pattern. Oh well, I just took in an extra 1/2" on both side seams to ensure a good fit. The end result was slightly skewed centre seams but they are camouflaged in the fabric. These pants fit me well. Happy!